
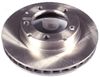
The Brake disc is the parallel-faced, circular, rotational member of a brake, acted upon by the friction material of the shoes.

What is Brake Bleeder Screw?
http://repairhelpcenter.blogspot.com/2011/12/what-is-brake-bleeder-screw.html
How to replace car Brake Cable?
http://repairhelpcenter.blogspot.com/2011/12/how-to-replace-car-brake-cable.html
Abs and service light comes on?
All types of brake problems and repairs
ABS light stays on but brakes work fine?
VCS maintenance required on Toyota Camry?
VCS and ABS lights go on and off intermittently on Lexus?
ABS & Brake lights warning indicator steady on dash and speedometer not working for Dodge Ram?
E-brake is stuck down on Ford Focus?
http://schematicsdiagram.blogspot.com/2011/12/e-brake-is-stuck-down-on-ford-focus.html
When the car stops, abs pump turns ON?
Where is Power Brake Booster located on 1995 Lincoln Town Car?
http://howtobyme.blogspot.com/2011/12/where-is-power-brake-booster-located-on.html
Sometimes ABS light comes on while Driving?
How Anti-Lock Brakes Work?
Brake System Troubleshooting?
Car Brake lines have no pressure?
How to Disconnect Power to EBCM on
http://schematicsdiagram.blogspot.com/2011/12/how-to-disconnect-power-to-ebcm-on.html
Where is ABS/TCS module located on 2005 Cadillac Deville
http://schematicsdiagram.blogspot.com/2011/12/where-is-abstcs-module-located-on-2005.html
How to Replace Power Brake Booster on 1996 GMC Jimmy?
Isuzu Trooper Shifts hard and Engine Revving in stop?
http://schematicsdiagram.blogspot.com/2011/12/isuzu-trooper-shifts-hard-and-engine.html
This is how brake disc basically looks.See the image below:----
Before replacing Brake disc,First inspect and know the brake components.
A complete inspection of the rotor, caliper, and pads should be done anytime you are working on the brakes. you should also check the wheel bearings.
See the diagram below:----
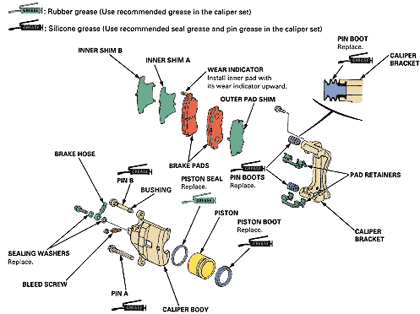 Whenever you are doing brake work, thoroughly inspect the entire brake assembly.
Some brake shoe pads have wear sensing indicators. The three most common design wear sensors are audible, visual, and tactile.
Audible sensors are thin, spring steel tabs that are riveted to or installed onto the edge of the pad's backing plate and are bent to contact the rotor when the lining wears down to a point that replacement is necessary. At that point, the sensor causes a high-pitched squeal whenever the wheel is turning, except when the brakes are applied, then the noise goes away. The noise gives a warning to the driver that brake service is needed and perhaps saves the rotor from destruction. The tab is generally installed toward the rear of the wheel.
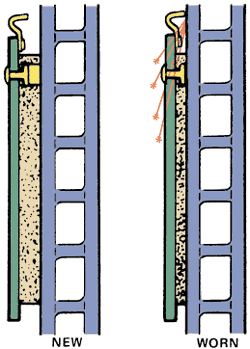 Operation of the wear indicator.
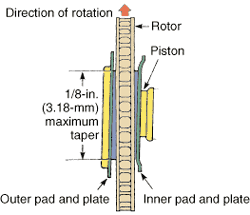 Normal pad wear pattern.
Some brake shoe pads have wear sensing indicators. The three most common design wear sensors are audible, visual, and tactile.
Audible sensors are thin, spring steel tabs that are riveted to or installed onto the edge of the pad's backing plate and are bent to contact the rotor when the lining wears down to a point that replacement is necessary. At that point, the sensor causes a high-pitched squeal whenever the wheel is turning, except when the brakes are applied, then the noise goes away. The noise gives a warning to the driver that brake service is needed and perhaps saves the rotor from destruction. The tab is generally installed toward the rear of the wheel.
- Visual sensors inform the driver of the need for new linings. This method employs electrical contacts recessed in the pads that touch the rotor when the linings are worn out. This completes a circuit and turns on a dashboard warning light. This system is found mostly on imports.
- Tactile sensors create pedal pulsation as the sensor on the rotor face contracts the sensor attached to the lower portion of the disc pad.
When a pad on one side of the rotor has worn more than the other side, the condition is called uneven wear. If you are not sure the pads are worn enough to warrant replacement, measure them at the thinnest part of the pad. Compare this measurement to the minimum brake pad lining thickness listed in the vehicle's service manual, and replace the pads if needed.
Uneven pad wear often means the caliper is sticking and not giving equal pressure to both pads. On a sliding caliper, the problem could be caused by poor lubrication of or deformation of the machined sliding areas on the caliper and/or anchor plate. A slightly tapered wear pattern on the pads of certain models is caused by caliper twist during braking. It is normal if it does not exceed 11/48-inch (3mm) taper from one end of the pad to the other.
After inspection,if its confirmed that brake disc is faulty,then yes it has to be replaced.For brake disc replacing procedure,go through the details below:-----
Before any service is performed, carefully check the following:
- Be sure the vehicle is properly centered and secured on stands or a hoist.
- If the vehicle has antilock brakes, depressurize the system according to the procedures given in the service manual.
- Disconnect the battery ground cable.
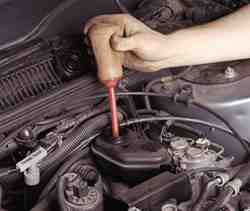
- Front brake pad replacement begins with removing brake fluid from the master cylinder reservoir. If this is not done, the fluid could overflow and spill when the pistons are forced back into the caliper bore, possibly damaging the painted surfaces.
- Replace the cover.
- Discard old brake fluid.
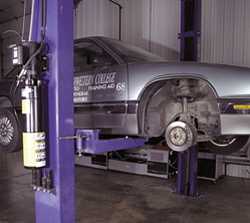
- Raise the car. Make sure it is safely positioned on the lift.
- If you don't have a lift, use a jack and jack stands.
- A handle on the jack is moved up and down to raise part of a vehicle and a valve is turned to release the hydraulic pressure in the jack to lower the part. At the end of the jack is a lifting pad.
- The pad must be positioned under an area of the vehicle's frame or at one of the manufacturer's recommended lift points.
- Never place the pad under the floorpan or under steering and suspension components, because they can easily be damaged by the weight of the vehicle.
- Always position the jack so that the wheels of the vehicle can roll as the vehicle is being raised.
- Never use a lift or jack to move something heavier than it is designed for. Always check the rating before using a lift or jack. If a jack is rated for 2 tons, do not attempt to use it for a job that requires a 5-ton jack. It is dangerous for you and the vehicle.
- Safety stands, also called jack stands, are supports of various heights that sit on the floor. They are placed under a sturdy chassis member, such as the frame or axle housing, to support the vehicle.
- Once the safety stands are in position, the hydraulic pressure in the jack should be slowly released until the weight of the vehicle is on the stands. Like jacks, jack stands also have a capacity rating. Always use the correct rating of jack stand.
- Never move under a vehicle when it is supported by only a hydraulic jack. Rest the vehicle on the safety stands before moving under the vehicle.
- The jack should be removed after the jack stands are set in place.
- This eliminates a hazard, such as a jack handle sticking out into a walkway. A jack handle that is bumped or kicked can cause a tripping accident or cause the vehicle to fall.
- If you use support stands on asphalt, put a piece of thick plywood or a steel plate under the stands.
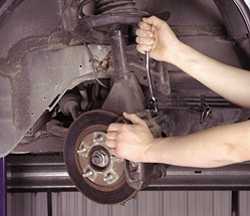
- Remove its wheel assemblies.
- Inspect the brake assembly.
- Look for signs of fluid leaks, broken or cracked lines, or a damaged break rotor. If a problem is found, correct it before installing the new brake pads.
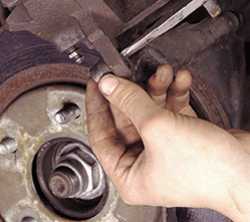
- Loosen the bolts and remove the pad locator pins.
- During servicing, grease, oil, brake fluid, or any other foreign material must be kept off the brake linings, caliper, surfaces of the disc, and external surfaces of the hub. Handle the brake disc and caliper in such a way as to avoid deformation of the disc and nicking or scratching of the brake linings.
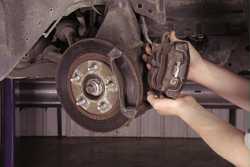
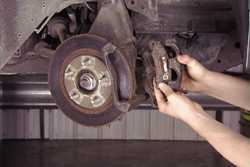
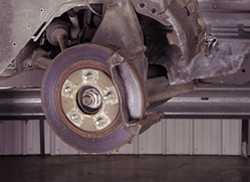
- Lift and rotate the caliper assembly from the rotor.
- Remove the brake pads from the caliper assembly.
- Fasten a piece of wire to the car's frame and support the caliper with the wire.
- When a hydraulic hose is disconnected, plug it to prevent any foreign material from entering.
- Check the condition of the locating pin insulators and sleeves.
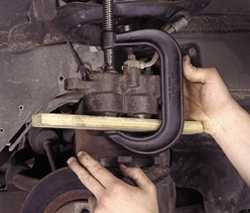
- Place a piece of wood over the caliper's piston and install a C-clamp over the wood and caliper.
- Tighten the clamp to force the piston back into its bore.
This details will help you.
---------------
If you need dis-assembly or replacement instructions for any other auto/car part, or you want to ask question related to your car/truck jeep problem then please leave the comment with your details, so I can provide you the required instructions and solutions.
For more brake related help solutions,see the list below


