@

Saturday, May 25, 2013

Whistle noise from engine

Car whistling noise


Problems Noticed By Customers Like 

  • Annoying whining/whistling sound from engine area.
  • Whistling noise from engine.
  • Whistling engine noise.
  • Whistling noise somewhere from the engine bay.
  • Engine whistle noise at idle.
  • Engine whistle noise problem.
  • Whistling noise coming from the engine and the check engine light is on, not blinking.
As soon as the engine gets warm it starts to make a whistle noise and after like 30 min the noise disappears.

  • If the check engine light is ON then get the vehicle scanned and see if the error core is stored in ECM. If yes then that error code will point out the possible fault.
  • Also you can get the smoke test done in the intake to confirm the problem.
  • Another thing that can be tried is ,use the stethoscope to hear the exact area of noise.Whether its from engine or outside engine.
  • It is easy enough to determine if the noise is in the engine or coming from an accessory. The belts can be removed and then the engine ran, if the noise is still there then it's in the engine.
  • If the noise is coming from inside the engine then it's most likely coming from the water pump. The water pump is in the center of the engine in the front and runs off the timing chain. 
  • The bearings in the pump can fail and make noise, and I've actually seen quite a few 2.7 water pumps that had a squeal like noise coming from the seal.

On many vehicles its noticed that when its hot sunny day the engine and other components gets hot and the noise is there much longer and gets more louder.

On the vehicles I've seen with water pump seal noise it has always been worse with the engine hot.

OTHER POSSIBILITIES:

  • It might be a belt or maybe a clamp on your exhaust is loose. At our auto repair garage a customers car used to make a terrible squealing noise when hit the brakes and it was exhaust.
  • Open the hood of the car and listen where its coming from and if its from a belt check for any cracks or signs of wear it could be old or a pulley that needs lubricated. If serpentine belt looks dried up,apply silicon spray on it to lubricate it.
  • On some vehicle models problem was with the air intake tube or boot, likely a crack or a loose connection.
  • On some car models it was Vacuum leak related problem.Check your intake boots and CCV hoses. Low throttle is when the engine has the highest vacuum, so the whistling is likely engine air entering the engine somewhere unmetered. Left alone, eventually will cause a check engine light.Also it can be intake elbow cracked underneath. Look in all the bends carefully.
This details will help.
Thanks.


Monday, May 13, 2013

Dodge: Problems & Solutions

Dodge Forum HelpZone

Troubleshooting Solutions For Dodge Vehicle Problems

Dodge 2500 Automatic Transmission

Check Engine Light ON

Rpm Goes Dead


PROBLEM:

1998 Dodge 2500 24 valve. Check engine light on & Rpm goes dead has no power then comes back after min or so.Local Mechanic told could be tps, cps or crank shaft position sensor.

OBD ii codes P0602 & P0222

SOLUTION:

First of all crankshaft sensor on these will in no way effect the running of vehicle, it is only used for the tach and for the transmission, it will not cause it to lose power.
Second thing  on this motor,there is no TPS, but instead there is an APPS means accelerator pedal position sensor, this is attached to the injector pump, where the throttle cable is attached.

Now as per the OBD error code mentioned 

The OBD ii code  P0222 is the one that is most likely causing your problems, it is a code for the APPS, when it loses power, idle issues will be noticed.
You will notice issues like vehicle idles up and down in gear.Out of gear rpm gauge pops up and down like your revving it up.

If you notice such idle issues then replacing APPS is advisable.
The other code P0602 is for the calibration of the ecm, it may be an old code, so clear the codes after replacing the apps and see if any come back

Location Of APPS

Accelerator Pedal Position Sensor Location


APPS is located on the injection pump, where the throttle cable attaches, this is a dealer part and will come with the sensor and the bracket and the throttle lever.
To replace APPS  you will need to pull the throttle cable off, then remove the 4 bolts that hold the bracket and sensor to the pump, then disconnect the sensor and remove it.

Please Note:
There are aftermarket sensors easily available, but they dont come with the bracket and lever, and almost impossible to get calibrated, so use a dealer part for this, they come [pre calibrated, so you just plug and play,and it will work.

See the diagram shown below:

APPS Location Dodge 2500


This will help.


Dodge Durango V8, 4-wheel drive


Dodge starts Only In Neutral

Dodge stalls in Reverse Mode


PROBLEM:

1998 Dodge Durango V'8, 4-wheel drive, won't start in Park but starts only in Neutral,  when  put it in reverse it stalls out.


SOLUTION:

There are few possibilities causing this problem.
  •  The mechanism inside the transmission that operates the neutral safety switch is worn out and will need to be replaced. In out technical language We call it the "rooster comb" because of the way it looks. 
  • As far as the stalling in reverse, it can be transmission torque converter problem.

But to confirm if its transmission issue or not,you will need to follow the simple test.

Try this if you hold your foot on the throttle, will it stay running when you put it in reverse?
If you first hold the throttle a little and then put it in reverse with your foot on the brake does it still stall out?

If yes then its issue with transmission torque converter.

On such issues vehicle will stall abruptly,like driving a car with a manual transmission and just let the clutch out without giving it any throttle.

The problem is the transmission's lock up torque converter stuck in a partial or full lock up mode. 
At Our Auto Repair Garage we see such problems every now and then, and the only best possible way to fix it is to pull the transmission and replace the torque converter. That will take care of the stalling problem. While the transmission is out, you can open it up (pull the pan and valve body) and replace the rooster comb. That will fix the no start in park problem.


Dodge Dakota ext cab V6

Gas gauge is stuck on 1/8 tank

PROBLEM:

1994 Dodge Dakota 3.9 V6 Auto 22 gal tank, Ext cab. 2WD. Gas gauge is stuck on 1/8 tank.


SOLUTION:

To diagnose the problem, you ned to check the resistance of the sending unit.

As per Service manual the actual range of resistance of the sender is 10 ohms when full to about 100 ohms when empty. 

If the resistance is not within specs then, the fuel sending unit is bad and will need to be replaced.

Fuel Sending Unit is located in the Fuel Tank.
It is integrated with the fuel pump unit.

To Test the resistance you will need voltmeter.
Keep voltmeter settings on OHMS reading.

Ground the sender wire (Dark Blue wire) while watching the fuel gauge.
It should go to full when grounding the sender wire.

You can access the wires going up to the top of the tank from under the vehicle

See the Fuel Sending Unit Wiring Diagram Shown Below:

Fuel sender wiring diagram


To Remove Fuel pump assembly 
You can access the pump by thus lifting the bed or dropping the tank.
It's 4 bolts on each side of the frame, disconnect the tail lights an the filler opening.

You can get fuel pump assembly here


2007 Dodge Ram 1500 4x4 


Transmission stuck in limp mode


PROBLEM:

2007 Dodge Ram 1500 4x4 with 5.7 is throwing OBD ii code P0750


SOLUTION:

OBD Code P0750 is for Shifting Solenoid A.
Vehicle trans is stuck in limp mode.

How To Replace Shift Solenoid A:

The solenoid is fitted in a assembly known as the solenoid pack. This assembly contains all of the shifting solenoids for the transmission. You cannot change just one solenoid. The whole solenoid pack will need to be replaced. 

In order to do that, 

  1. The transmission oil pan will need to be removed. 
  2. Then the valve body is removed.
  3. And the solenoid pack which mounts on top of the valve body can be replaced. 

Difficulty Task To Do This Job:

If you have removed and replaced valve bodies before, then this should be fairly easy for you. If not, then you may want to have a shop that has done thus before take care of this. It is not super hard, but you will need a clean dust/dirt free area to do that. 


2005 dodge caravan


Hard Brake pedal


PROBLEM:

2005 dodge caravan, hard brake pedal and little braking. 
Problem Started after installing  new pads and bled brake lines. Can't get the pressure back right. 
Brake pedal stays hard and low braking ability.
Braking was ok before brake pads replacement.

SOLUTION:

This problem is noticed because brake line is not bled properly.There is some air gap in between the brake lines and that's causing the problem.

Its Suggested to bleed the whole system again.

The basic procedure To Bleed Brake Line is as follows:
  1. Apply pressure to pedal.
  2. Open bleed valve.
  3. Tighten valve as pressure releases from pedal.
Please Note: You should not  loosen bleeders to depress the calipers, On ABS systems this is a no no. It allows air into the system
Too late now so have to work the problem
Do bleeding in the order . Its difficult to do this on ABS system.

  • When bleeding and pushing pedal all the way to floor very hard can damaged it.

Now see if the brake pedal works fine or its brick hard to press.

If the brake is still very hard then its issue with Brake booster assembly.

Brake booster is the system behind the master cylinder.

There is a large hose going to it. You have to remove that hose, engine running to be sure good vacuum.If so, this is what you want, 

If you do the bleeding, still little braking and hard pedal, then you may have a failed brake booster
It is what gives the power brakes. 

I suggest to re-bleed, bleed each wheel real good,as mentioned above.


CAUTION: Before removing the master cylinder cover, thoroughly clean the cover and master cylinder fluid reservoir to prevent dirt and other foreign matter from dropping into the master cylinder fluid reservoir.

NOTE: The following wheel sequence should be used when bleeding the brake hydraulic system. The use of this wheel sequence will ensure adequate removal of all trapped air from the brake hydraulic system.

Left Rear Wheel
Right Front Wheel
Right Rear Wheel
Left Front Wheel

You must bleed in order or you will not center the ABS spool valves after that.
If that does not work, brake booster is highly likely the problem

Friday, April 5, 2013

Lincoln power window won't go up

Power Window Will Not Go Up


Few common and most possible  possibilities for this problem are:


Bad motor, bad window regulator, or a bad switch.

How To Confirm This Issue?

  • The best way to tell if the switch is working is to use a test light. You can either pop out the trim piece on the door with the switch and check for power on the proper wire. 

  • One wire will show positive voltage with the switch in the up position and the other wire will be positive with the switch in the down position. 


  • The best thing though is to take off the door panel and use the test light right on the window motor electrical connector to make sure power is getting there in both the up and down positions of the switch. 

  • If one of the terminals gets power with the switch in the down position, then the other terminal should get power with the switch in the up position. 

  • If you are getting power down, but not up then you have a bad switch. If you have power to both up and down then the motor is at fault. 
Many a times you replace the motor but still problem exists, on that cases the issue is with faulty regulator.Or the new motor you got is bad stock motor.Get the motor confirmed.
  • You must also make sure that the regulator is not bound or seized causing the motor to not be able to take the window back up.

We usually replace the regulator because the cables will get all twisted up and it is nearly impossible to re-wind them.

 If the cables where twisted, would that not stop the motor from running? 

The motor will continue to run if the cables are out of place.  There is a plastic guide on the regulator and the cable will come off of the track.  Then the motor will run until the cable finally gets tightened enough to stop the motor.

But if you can get the window all the way up.  Twisted cables usually bind the motor and you'll hear the sound of crunching as the cables get all tangled up.  Best possible way is to pull the door panel and inspect the regulator.  If the regulator looks good, the motor needs a ball kit.


This will help.
Thanks.


jaguar s-type engine light on restricted performance

Dash says restricted performance Jaguar s-type


Vehicle Details:
Make: Jaguar
Model: S-Type
Year: 2003
Engine: v-8

Expert's Reply:

I suggest To Get The Vehicle Scanned For Error Codes.

Customer:

Got scaned it with a portable scaner it came back fuel trim problem

codes P0171 and or P0174 for bank 1 and/or bank 2 lean?
Also Code P1000


Customer:
I recently put in a fuel injector cleaner w/intake valve cleaner from Valvoline into the tank of my 2003 jaguar s type for the first time. Later that same day, I received a "restricted performance" light on my dash. 


Expert's Reply:

The P1000 just means that the car hasn't finished its system readiness checks. It can't be cleared. After a while it will change to P1111, which means that the system readiness checks have been completed and all is well. These codes are nothing to worry about and one or the other will always be there. Because you cleared all the codes, it would clear P1111 as well and have to start the checks over again giving you the P1000. 

The P0171 means Bank 1 is running lean. Can be caused by different things like fuel injectors problem, fuel filter problem, misfire, MAF sensor fault to name a few. Whether or not it is related to the fuel cleaner I don't know. Could be that using that loosened up some stuff and plugged the filter, or it could be something else completely unrelated. I've used fuel injector cleaner on my STR and didn't have any trouble.


Ok those lean codes are usually caused by the air flow meter sensor on the air cleaner housing. It may also be a vacuum leak. If this is a super charged engine there are issues with the intake seals leaking. If this is not super charged it still can be a leak. Pull up on the oil dip stick and make sure there is an o-ring seal on the top of it. Then remove the engine cover and give the vacuum lines a visual check. Lastly make sure the air tube going to the throttle is not loose.


Any Other Things To Check:

We will need to either check the system with smoke or use carb cleaner and monitor the fuel trims. Since specialty equipment is needed to do this it may be difficult to do yourself. Some other places we find vacuum leaks is with the breather valve on the passenger side valve cover and the back of the intake where there is a plate. If there are no leaks I suspect a faulty mass air flow sensor.

This details will help.
thanks.


Thursday, April 4, 2013

expansion valve Lexus rx300

Lexus Expansion Valve

To replace the expansion valve (AC system)

 It is up behind the dash on the passenger side of the vehicle.

Have you checked the sight glass for refrigerant flow, bubbling as the compressor starts up and after it stops..??

The seal is bad on the compressor.


The compressors are failing due to "slugging", ingesting liquid refrigerant. Do you feel the cooling capability is satisfactory up until the seals fail? In that case the expansion valve is probably working properly and your compressor have failed most likely due to refrigerant overcharging.

There is also the possibility the compressor clutch is remaining engaged with the electricity off.

If In Your case the expansion valve is faulty,then for new valve it costs approx $85 to 90.But at few auto parts store they give good 30 to 40 percent discount on parts.

At parts geek dot com you get the denso brand expansion valve for your Lexus at $85 but with discount you get for $37.

ALSO READ THIS ISSUE OF LEXUS RX #)) VEHICLE:

Its 99 Rx300. The a/c light is blinking. Suddenly quit cooling. The clutch will engage when I first turn on the hvac, but after about 2 seconds, it dis-engages. A soft slight whining/squeeling sound comes from the compressor when it begins to engage.
Any ideas on what it could be? Should I replace the compressor or could I have an expansion valve issue or something else?


Expert's Reply:

As per problem described it indicates that it is a compressor issue.
As per the system the computer will shut off power to the magnetic clutch when it detects the compressor isn't turning and causes the light to blink to alert the driver. You will want to make sure the drive belt is properly adjusted. You have probably already checked that, but I just wanted to mention it just in case. The noise when the clutch engages tells me the compressor may have an internal issue and has seized or is not spinning as freely as it should or the clutch is slipping. With the engine off, you should be able to turn the compressor by hand at the clutch.

Where is Expansion Valve located?

The thermal expansion valve is under the passenger dash next to the evaporator, the system has to be discharged and the dash torn apart to get to this..

ALSO READ THIS:


One of our garage repair customers issue:

I recently replaced my A/C compressor and dryer. But the air is not as cold as it should be right now. I had it tested at an A/C repair shop and they told me the Expansion Valve was clogged, probably due to trash in the line from the replacement of the old compressor.

The part is less than $50 but they state labor will be around $350 because this valve is behind the dashboard.


See the image shown below:

Lexus expansion valve


For expansion valve  location on a  Lexus gs300


It is attached to the evaporator (cooling coil) and here are the removal procedures.

EXPANSION VALVE
Removal & Installation:
Disconnect negative battery cable.
Discharge A/C system, using approved refrigerant recovery/recycling equipment.
Disconnect and plug refrigerant lines from evaporator.
Remove instrument panel.
Remove packing from expansion valve.
Using Expansion Valve Wrench Set (07117-61050), separate expansion valve and tube and accessory.
To install, reverse removal procedure.
Evacuate and charge A/C system. Inspect system for leaks.


A/c Expansion valve

Tuesday, March 26, 2013

2005 Cadillac DeVille driver's side door will no longer open from the inside

Door Will Not Get Open From Inside

Most probably the inside door Handel holding assembly is got bit loose or the door Handel is broken and needs replacement.
The door Handel assembly easily available at local auto part store or at dealer.

It costs approx $30 to $ 50.The rate depens on quality and store.

What's Inside The Door Panel Assembly

You'll need to remove screws that are by the door handle, arm rest, under door and side of door and then gently pull back on the panel as there will also be retaining clips attached and you don't want to break them.

You'll need to lift the door panel upwards in order to get it off the window ledge.

If needed, you can pull back the weather seal (can't reuse it, but it's not that important) and you will be able to access everything inside the door.


If the Door Is Not Getting Open and To Manually Open the Door From Inside


You need  remove the cover that is behind the inside door handle and  you will see the arm that connects to the handle.
Inspect this arm carefully, if its connected then you will have to remove the inner door panel,if its come off the handle and you get a hold of it you can pull on it and the door should open.

Please dont apply force,you have to be patient to remove the door panel with the door closed.
You will need to remove some screws to loosen the panel from the steel door inner panel.(arm rest,cover behind the handle).
Once this is done pop up the power door/window switch control and remove the plug attached.
Pull out the inner door panel to unhook the clips around the outside edge of the panel,you will have to move the seat to get better access to some,then remove the panel and reach into the inner door and move the unlock arm to open the door.
You may have clips that are broken that allowed the arms to come off that need replacing to fix the problem.
The clips are made up of plastic and easily available at Auto parts store.


ALSO view the condition of door handel,is the cable that holds the handel from inside got loose.

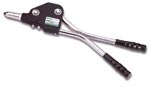
The inside handle is broken and not pulling the cable. When you replace it you will need either a commercial rivet gun and large rivets (like the factory used):
door Handel fittings
Or replace the rivets with a nut & bolt. If you use the nut & bolt I would use some blur Lock-Tite.


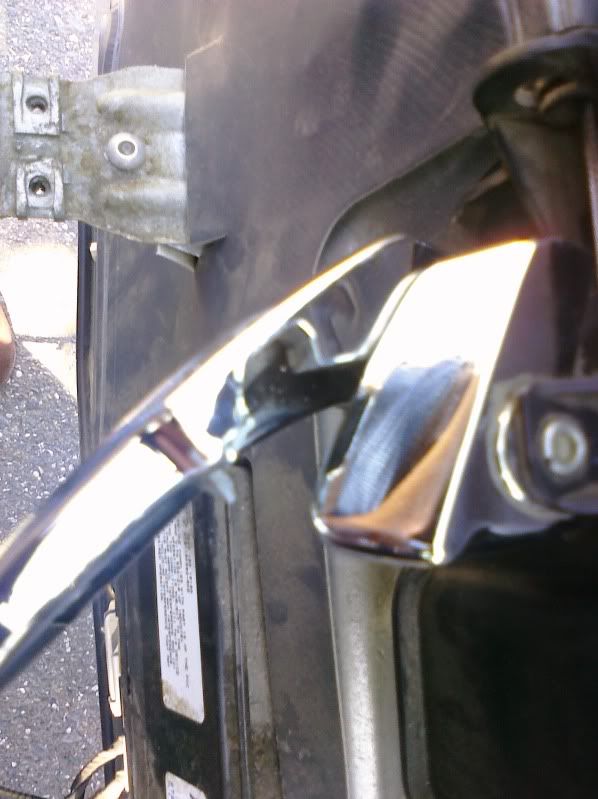
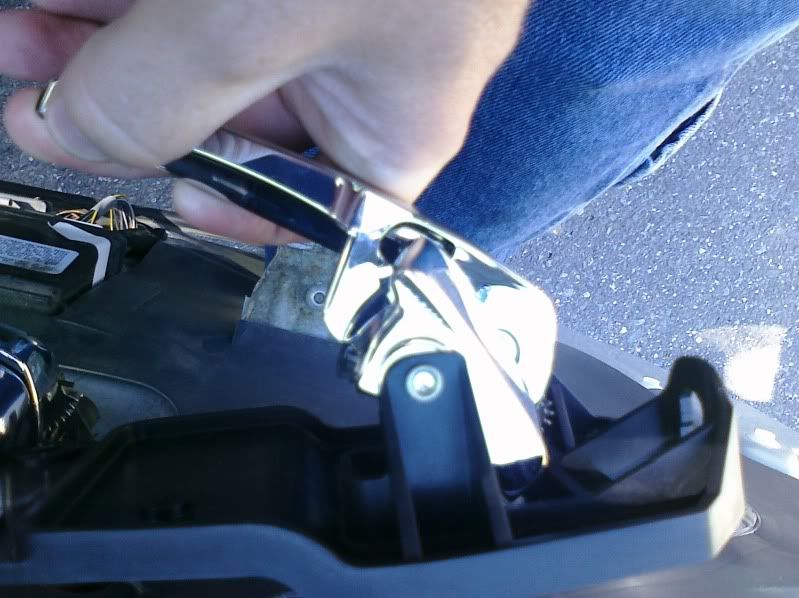
Basically there are two types of door handel used.

See the image shown below:

door handel replacement

The first one is missing a piece of plastic on the handle right were the lock latch is.
Cadillac deville driverside door Handel.


If the door lock changes position while the door is closed, the interior door handle will open the door only once, and then the door will not latch nor will the handle operate the mechanism UNTIL you lock and unlock the door, which can take several times pressing lock and unlock until it unjams itself.


If the door latch is not completely unlocked, it won't latch when you close the door.

You can test this by holding the lock knob down a bit, and try closing the door.

The repair on such cases needs a new lock actuator, it will not unlock fully because the rubber boot is gone, and it corroded the solenoid.


This details will help.
Thanks.


ALSO VIEW THIS RELATED:

For Car parts and diagrams:

CAR MANUAL GUIDE
                 
FOR FREE MANUALS AND GUIDES: ---
Car repair guide?


For all types of car repair help:


Car Backfires

For car repair How to guides:


OVERHEATING: Radiator Fan Not Working

Engine Cooling Fan not Working


"Radiator fan"  "Engine Fan"  "COOLING FAN WILL NOT TURN OFF"

LIFT GATE / TAIL GATE ISSUES

TRUNK WILL NOT OPEN


CAR ALARM ISSUES


Car starter removal, Starter motor testing, Starter repairs, Starter solenoid, Starter wiring,


DOOR PANEL REMOVAL, car door panel, door panel components, front door panel, rear door panel,


HEATER CORE REPLACEMENT, HEATER CORE REMOVAL, TROUBLESHOOT HEATER CORE, FLUSH HEATER CORE,

CAR POWER SEAT, ELECTRIC SEAT, POWER SEAT WILL NOT WORK, SEAT WILL NOT GO FORWARD,


For all types of---------

Timing belt routing diagrams for cars and trucks?


==========

For all types of --------

Drive belt routing diagrams for cars and trucks?


stalling issues:
Engine stalls, car stalls while starting, vehicle stalls while starting, Engine stalls and dies, Car stalls and stops,


CRUISE CONTROL Not working, cruise control replacing, troubleshooting cruise control problems,


TRANSMISSION PROBLEMS:

NO REVERSE ON TRANSMISSION

GEAR SHIFT ISSUES

Transmission fluid leak, transmission gears slip,


TRANSMISSION REPLACING AND TROUBLESHOOTING, INSPECTING TRANSMISSION COMPONENTS, TRANSMISSION FAILURES, OD WARNING LIGHT,


TRANSMISSION FLUID FILLING, WHERE TO FILL TRANSMISSION FLUID, AUTOMATIC TRANSMISSION FLUID, NO TRANSMISSION DIPSTICK,


WINDSHIELD WIPERS, WINDSHIELD WIPERS NOT WORKING,WIPER MOTOR MAKING NOISE,NO WIPERS,WIPER FLUID LEAKS,WIPER FUSE AND RELAY,


COOLANT LEAK ISSUES, COOLANT LEAK PROBLEMS, COOLANT SENSOR, LOW COOLANT,


BRAKE LIGHTS NOT WORKING, REPAIRING BRAKE LIGHTS, NO BRAKE LIGHTS,


CHECK ENGINE LIGHT,ENGINE WARNING LIGHT FLASHING,ENGINE LIGHT ON DASH,DASHBOARD WARNING LIGHT,ECM ERROR CODES,


DASHBOARD WARNING LIGHTS ARE ON, ENGINE LIGHT ON DASH,WARNING LIGHTS STEADY ON DASH,RESET DASH BOARD WARNING INDICATOR,


KEYFOB PROGRAMMING, REPROGRAMMING CAR KEY, KEYLESS ENTRY RESET,ANTITHEFT WILL NOT LET CAR TO START, ANTI THEFT ISSUES, KEYFOB NOT WORKING, KEYLESS ENTRY QUIT WORKING,


IGNITION KEY WILL NOT RELEASE, IGNITION KEY STUCK UP, KEY WILL NOT COME OUT OF IGNITION, FAULTY IGNITION KEY LOCK CYLINDER, REPLACING IGNITION CYLINDER,


HEATER ISSUES:

HEATER NOT BLOWING COLD,NO HOT AIR FROM HEATER,A/C BLOWS HOT AIR,A/C NOT BLOWING COLD, COLD AIR FROM HEATER,BLEND DOOR ACUTATOR CLOSED,HVAC UNIT NOT OPERATING,


HEATER NOT BLOWING COLD,NO HOT AIR FROM HEATER,A/C BLOWS HOT AIR,A/C NOT BLOWING COLD, COLD AIR FROM HEATER,BLEND DOOR ACUTATOR CLOSED,HVAC UNIT NOT OPERATING,


STEERING ISSUES:

POWER STEERING TROUBLESHOOTING, STEERING SQUEAKS, POWER STEERING FLUID LEAKS, FAULTY POWER STEERING PUMP, POWER STEERING NOT WORKING, POWER STEERING BELT,


VEHICLE STARTING ISSUE:

CAR NO START: ENGINE NOT TURNING OVER:

How to Replace 2008 Mazda 2.3L Timing Chain?

2008 Mazda 6 2.3L use a timing chain.

Timing chain ( on the 2.3 liter 4 cylinder and the 3.0 liter V6 ).

It seems that the Timing Chain Tensioner in this car has the tendency to fail.

The exact problem can be described as a rattling/ticking sound coming from the left corner of the valve cover (where the chain is.) It get more audible as the car is warmed up.You can hear it in the cabin at idol pretty easily.

It requires three special tools from Mazda according to ALLDATA.

I have built a fair amount of these motors and the biggest pain is getting a good angle on the front cover which is between the passenger side tire and the motor. You do have to take off a few covers and belts for good access and its not the easiest thing -


Timing chains dont need special tools to change out.

Is the spring failing or the plastic piece that contacts the chain?

Here is the common procedure to replace Timing Chain for Mazda 6 2.3L engine model:----


TIMING CHAIN REMOVAL/INSTALLATION L3

Please Don't Ignore the Warning Note:
Fuel vapor is hazardous. It can very easily ignite, causing serious Injury and damage. Always keep sparks and flames away from fuel.
Fuel line spills and leakage are dangerous. Fuel can ignite and cause serious injuries or death and damage. Fuel can also irritate skin and eyes.

TIMING CHAIN REMOVAL STARTS:
Disconnect the negative battery cable.
Remove the plug hole plate.
Remove the spark plugs.
Remove the tire (RH).
Remove the under cover.
Loosen the water pump pulley bolt and remove the drive belt.
Remove the Crankshaft Position (CKP) sensor.
Drain the engine oil.
Remove the P/S oil pump with the oil hose still connected and position the P/S oil pump so that it is out of the way.
Remove the front drive shaft (RH) from the joint shaft.


Remove in the order indicated in the table above.
Install in the reverse order of removal.
Start the engine and:
Inspect for the engine oil, engine coolant, transaxle oil and fuel leakage.
Verify the ignition timing, idle speed and idle mixture.
Perform a road test. Crankshaft Pulley Lock Bolt Removal Note
Remove the cylinder block lower blind plug.
Install the SST.


View the Timing chain Disassembly diagram shown below:---

Timing Chain replacing


mazda timing chain


Note down the marks properly while disassembly. Is there any marks on the camshafts that would indicate where they should be when reinstalling to line up with the crankshaft.

To adjust the timing chain.Rotate the crankshaft clockwise until the crankshaft is in the No.1 cylinder TDC position (until the balance weight is contacting the SST).

timing chain tensioner adjustment


Hold the crankshaft pulley using the SSTs. Chain Tensioner Removal Note

Hold the chain tensioner ratchet lock mechanism away from the ratchet stem using a thin screwdriver.
Slowly compress the tensioner piston.
Hold the tensioner piston using a 1.5 mm (0.059 in) wire or paper clip.


ALSO VIEW THIS RELATED:

For Car parts and diagrams:

CAR MANUAL GUIDE
                 
FOR FREE MANUALS AND GUIDES: ---
Car repair guide?


For all types of car repair help:


Car Backfires

For car repair How to guides:


OVERHEATING: Radiator Fan Not Working

Engine Cooling Fan not Working


"Radiator fan"  "Engine Fan"  "COOLING FAN WILL NOT TURN OFF"

LIFT GATE / TAIL GATE ISSUES

TRUNK WILL NOT OPEN


CAR ALARM ISSUES


Car starter removal, Starter motor testing, Starter repairs, Starter solenoid, Starter wiring,


DOOR PANEL REMOVAL, car door panel, door panel components, front door panel, rear door panel,


HEATER CORE REPLACEMENT, HEATER CORE REMOVAL, TROUBLESHOOT HEATER CORE, FLUSH HEATER CORE,

CAR POWER SEAT, ELECTRIC SEAT, POWER SEAT WILL NOT WORK, SEAT WILL NOT GO FORWARD,


For all types of---------

Timing belt routing diagrams for cars and trucks?


==========

For all types of --------

Drive belt routing diagrams for cars and trucks?


stalling issues:
Engine stalls, car stalls while starting, vehicle stalls while starting, Engine stalls and dies, Car stalls and stops,


CRUISE CONTROL Not working, cruise control replacing, troubleshooting cruise control problems,


TRANSMISSION PROBLEMS:

NO REVERSE ON TRANSMISSION

GEAR SHIFT ISSUES

Transmission fluid leak, transmission gears slip,


TRANSMISSION REPLACING AND TROUBLESHOOTING, INSPECTING TRANSMISSION COMPONENTS, TRANSMISSION FAILURES, OD WARNING LIGHT,


TRANSMISSION FLUID FILLING, WHERE TO FILL TRANSMISSION FLUID, AUTOMATIC TRANSMISSION FLUID, NO TRANSMISSION DIPSTICK,


WINDSHIELD WIPERS, WINDSHIELD WIPERS NOT WORKING,WIPER MOTOR MAKING NOISE,NO WIPERS,WIPER FLUID LEAKS,WIPER FUSE AND RELAY,


COOLANT LEAK ISSUES, COOLANT LEAK PROBLEMS, COOLANT SENSOR, LOW COOLANT,


BRAKE LIGHTS NOT WORKING, REPAIRING BRAKE LIGHTS, NO BRAKE LIGHTS,


CHECK ENGINE LIGHT,ENGINE WARNING LIGHT FLASHING,ENGINE LIGHT ON DASH,DASHBOARD WARNING LIGHT,ECM ERROR CODES,


DASHBOARD WARNING LIGHTS ARE ON, ENGINE LIGHT ON DASH,WARNING LIGHTS STEADY ON DASH,RESET DASH BOARD WARNING INDICATOR,


KEYFOB PROGRAMMING, REPROGRAMMING CAR KEY, KEYLESS ENTRY RESET,ANTITHEFT WILL NOT LET CAR TO START, ANTI THEFT ISSUES, KEYFOB NOT WORKING, KEYLESS ENTRY QUIT WORKING,


IGNITION KEY WILL NOT RELEASE, IGNITION KEY STUCK UP, KEY WILL NOT COME OUT OF IGNITION, FAULTY IGNITION KEY LOCK CYLINDER, REPLACING IGNITION CYLINDER,


HEATER ISSUES:

HEATER NOT BLOWING COLD,NO HOT AIR FROM HEATER,A/C BLOWS HOT AIR,A/C NOT BLOWING COLD, COLD AIR FROM HEATER,BLEND DOOR ACUTATOR CLOSED,HVAC UNIT NOT OPERATING,


HEATER NOT BLOWING COLD,NO HOT AIR FROM HEATER,A/C BLOWS HOT AIR,A/C NOT BLOWING COLD, COLD AIR FROM HEATER,BLEND DOOR ACUTATOR CLOSED,HVAC UNIT NOT OPERATING,


STEERING ISSUES:

POWER STEERING TROUBLESHOOTING, STEERING SQUEAKS, POWER STEERING FLUID LEAKS, FAULTY POWER STEERING PUMP, POWER STEERING NOT WORKING, POWER STEERING BELT,


VEHICLE STARTING ISSUE:

CAR NO START: ENGINE NOT TURNING OVER:

@